poses for your grad photos.
I get it — it’s hard coming up with ideas for your graduation pictures. So, I decided to make a list of the poses I typically do during my own grad sessions. It’s a mix of traditional and dynamic poses to help you look your best during your photo shoots.
Of course, during my sessions, I will verbalize these instructions to you. And for the ones that are a bit more complex, I’ll actually bring my own stole and physically demonstrate them for you.
the over the shoulder.
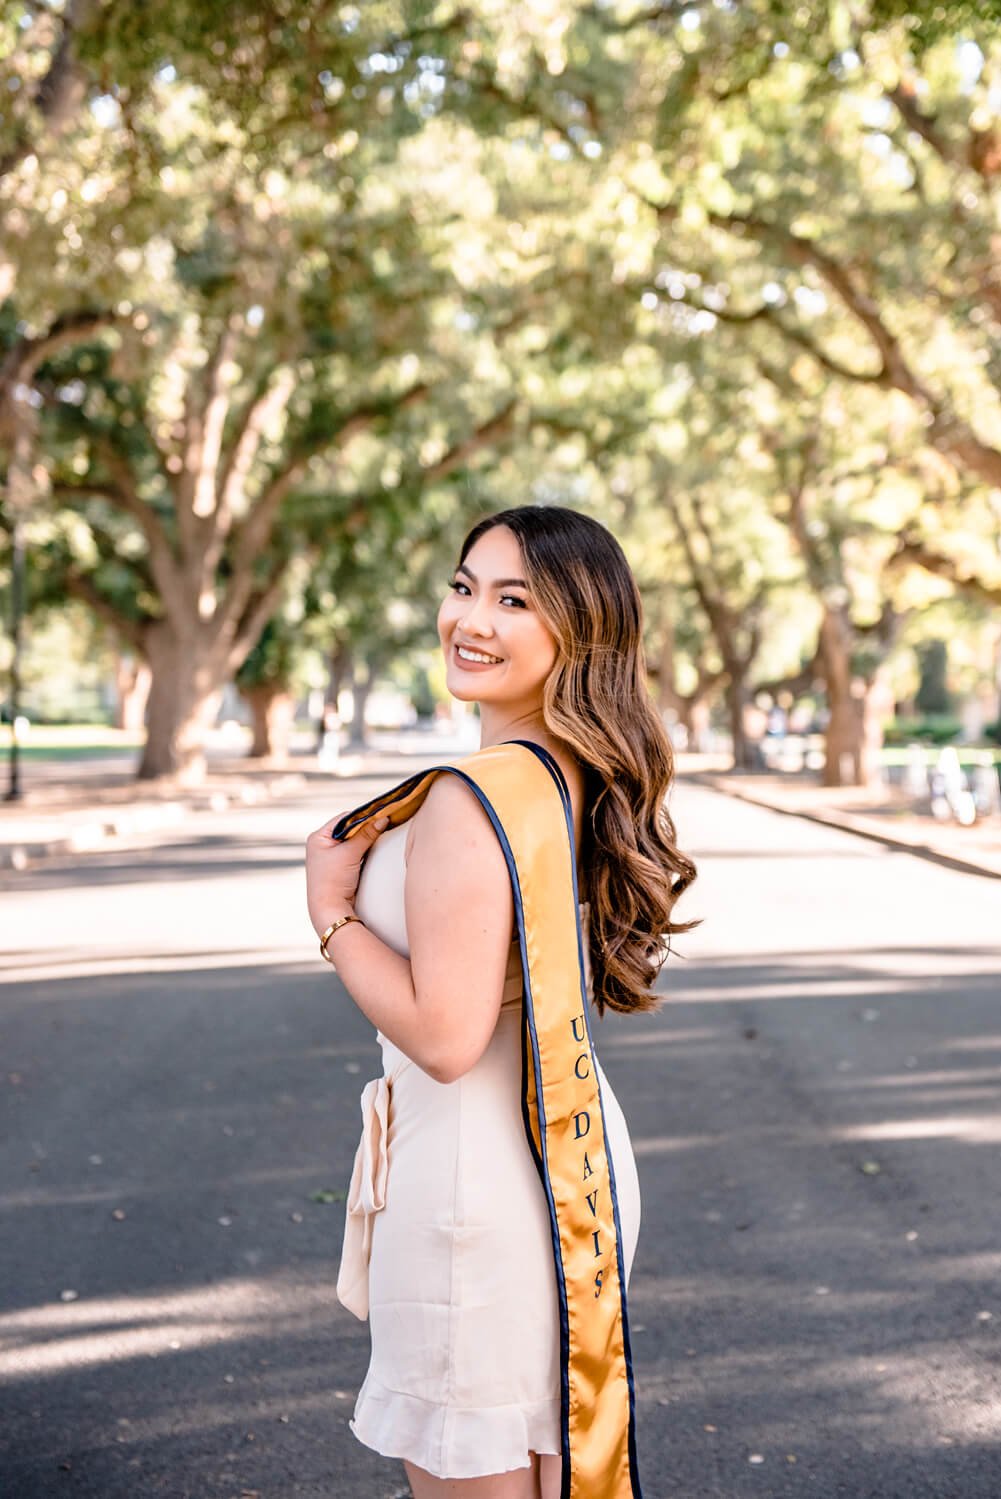

To keep things simple, this guide assumes that you want to look over your left shoulder and show more of the left side of your face. Of course, if you want to do the opposite, just switch up the steps.
steps.
Face away from the camera and put your right foot forward and left foot back. This will give you a lot more leverage when you’re turning back (rather than having your feet together). You want to give the idea that you’re stepping away from the camera
Fold your stole in half to show off one side of the stole. Grab your stole with your left hand and put it over your left shoulder.
Rotate your chest to the 10 o’clock position and rotate your neck (without straining) towards the camera.
the cap throw.


steps.
Hold your cap at the corner and bring that arm down, right next your waist.
Next, bring your arm all the way to the very top and throw the cap in the air. You kind of want to toss and flip the cap at the same time when you release it, and you’ll want to do this with force.
Optional: Add a little leg kick to make your photos more dynamic.
Leave your arm up in the air and wait for the cap to hit the ground.
If you immediately put your arm down after throwing, it will look like there’s a floating cap in the photo. So, for the sake of your photographer, leave your hand up in the air.
I like to do this shot two ways: one where you’re looking directly at the camera and another where you’re looking up at the cap as you’re throwing it.
the stole stretch.


steps.
Wear your stole normally and hold the both bottom parts of your stole with both hands.
Bring one side of your stole all the way up in the air, and bring the other part just slightly to the side.
Ideally, you’re able to stretch your arms all the way out, so it looks like a slanted line.
Make sure that the front part of your stole is visible, so we can see the name of your school.
the flutter stole.


steps.
This pose looks much better a side angle, so point your toes 90° away from the camera and only bring your head towards the camera.
Grab your stole and hold the center (the part where your neck goes) firmly in the hand that’s furthest away from the camera.
Rotate your arm 180°. To give the stole that flutter effect (like a flag in the wind), you have to rotate your arm. If you just “lift” the stole, it doesn’t really do anything.
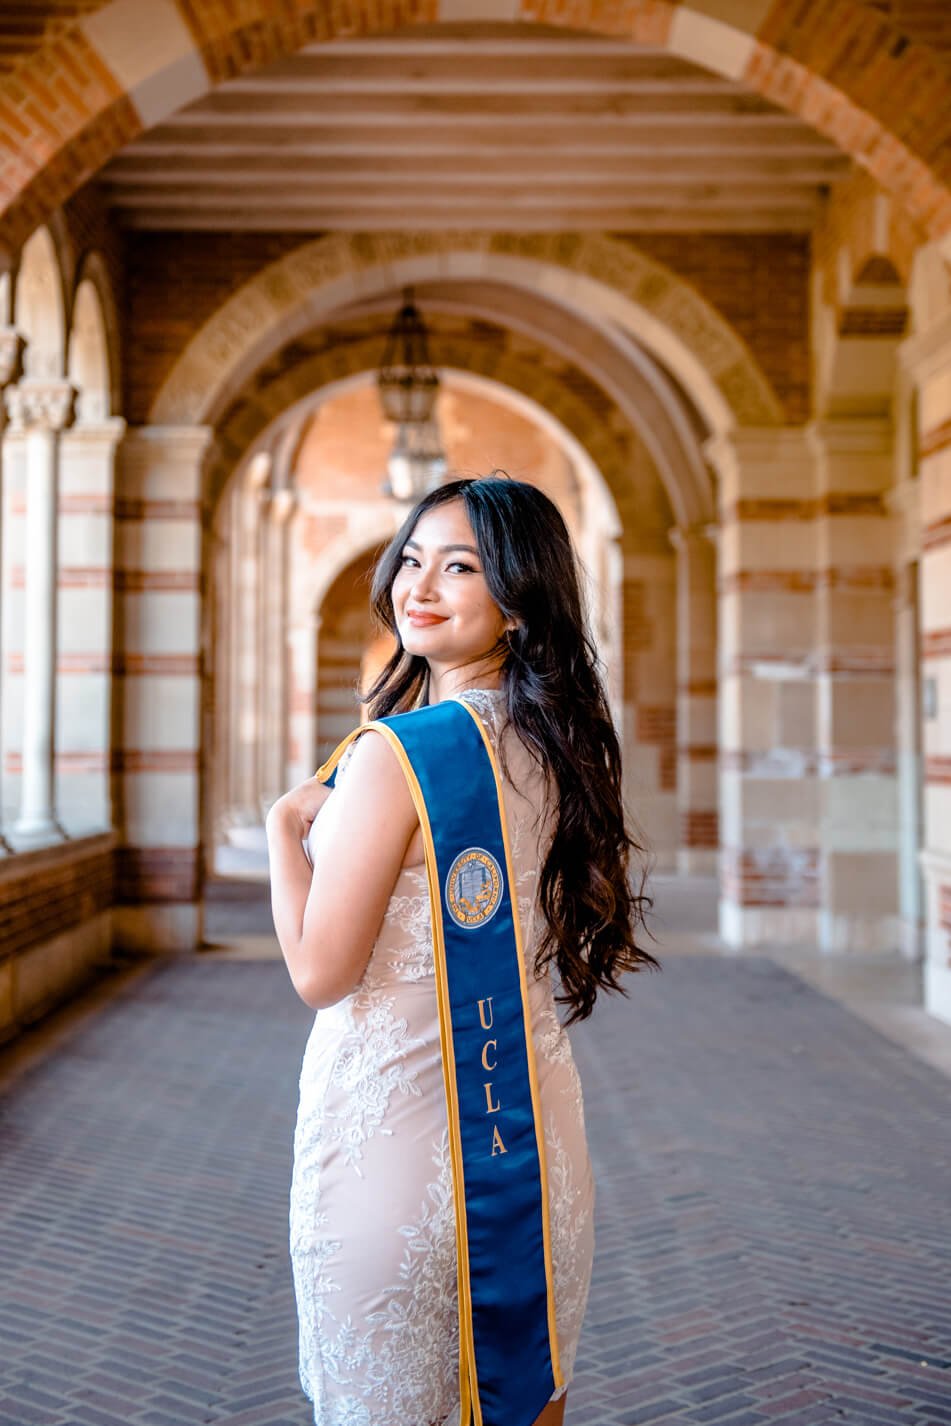
the gown shot.


steps.
Drape the gown over the shoulder. Then have have someone “hook” the stole onto one of your fingers.
The other hand should be holding the cap with the top part facing outwards.
Bring your chest to the 10 o’clock position, and without straining, rotate your neck towards the camera.
the cross-legged sit.
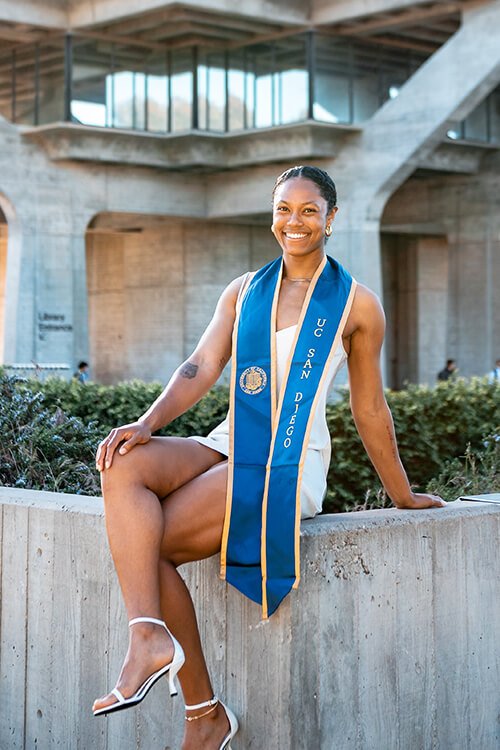


steps.
Sit down and point your knees out to the side.
Make sure your legs are crossed at your thighs. If you’re unable to, crossing at the ankles will work.
Put one hand on your knee and the other directly behind you.
Also, make sure that both parts of your stole are visible. So, move both parts to one side of your body.
the walk and lookout.


steps.
Make sure your toes are pointed forward and walk like a model down a runway.
Halfway through your walk, lookout to the side, into the distance.
Then, pretend like you’re tucking your hair behind your ear.
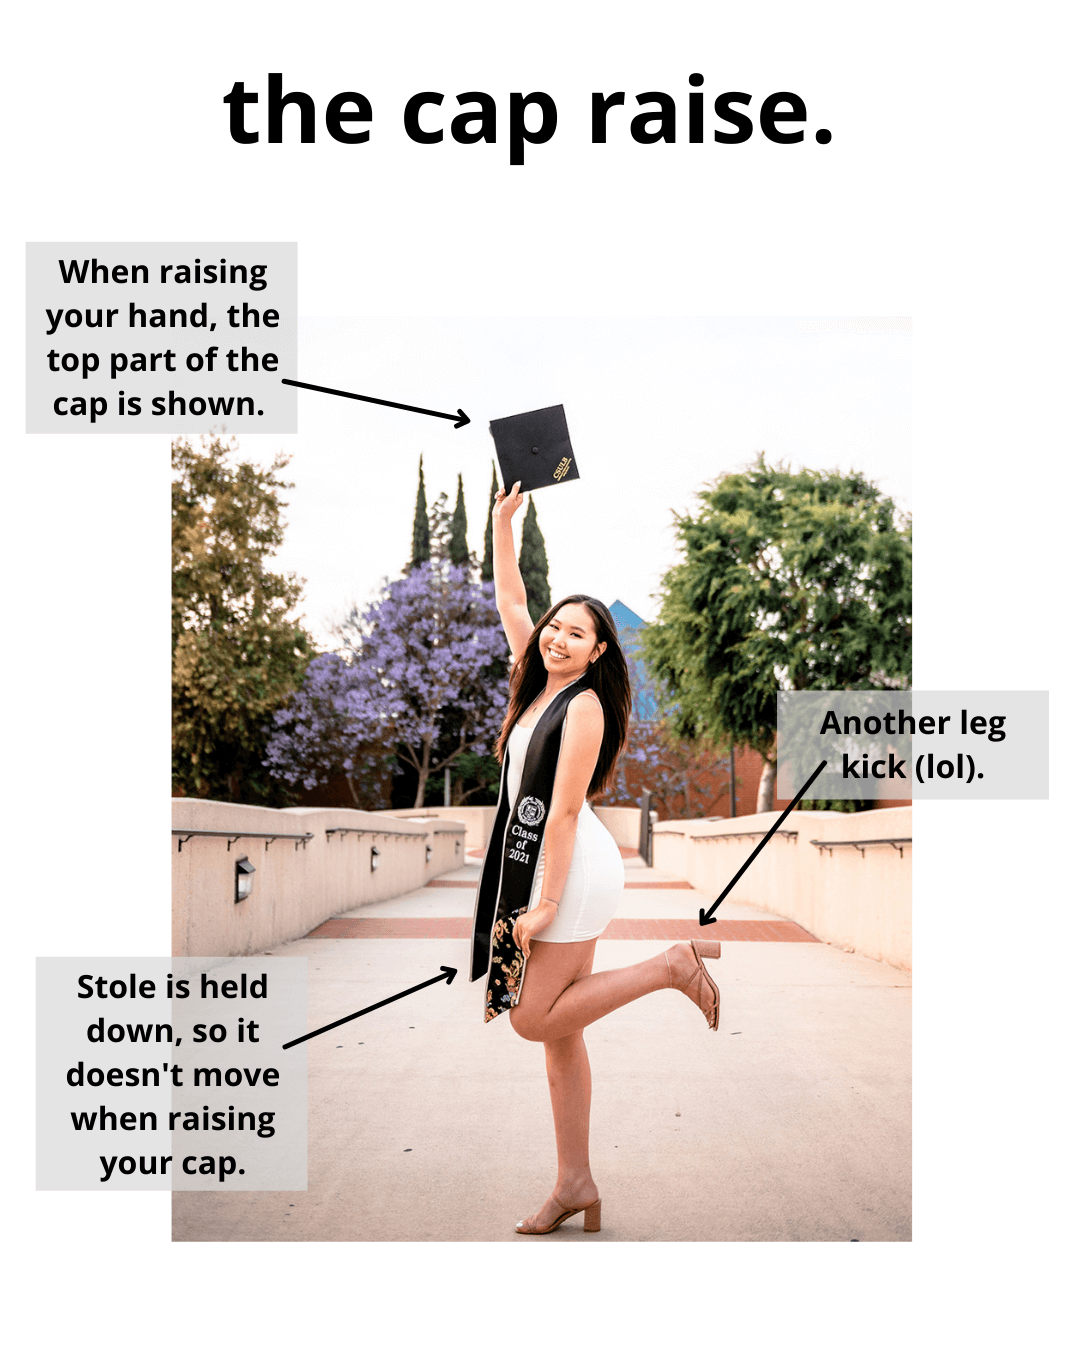
the cap raise.
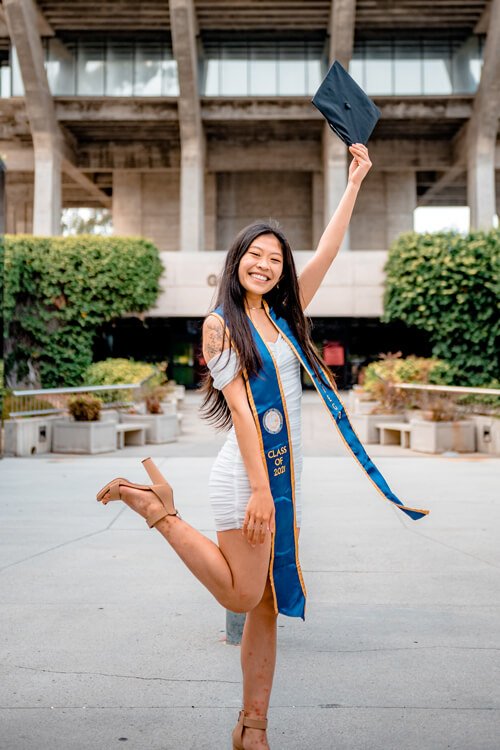
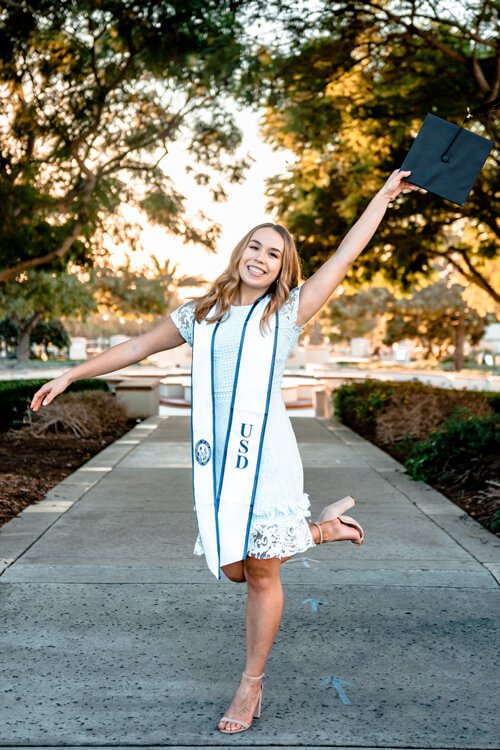
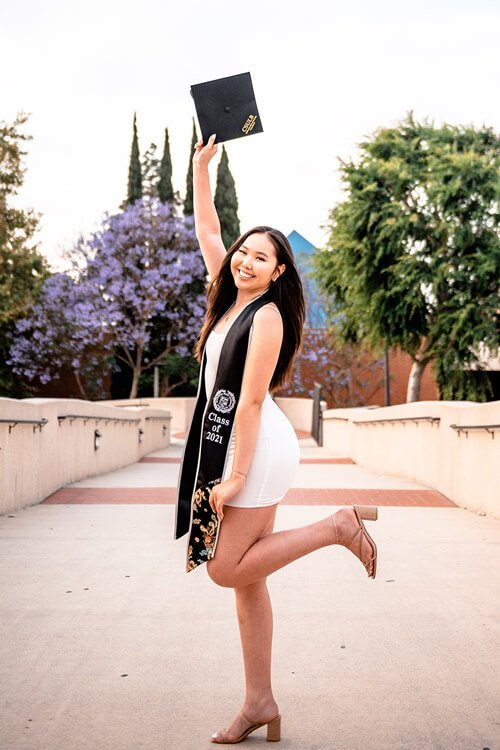
steps.
Grab your cap with one hand and hold it at the very corner.
Then, raise your cap in the air and make sure to show off the top of the cap.
As you’re doing that, you’ll want to add a leg kick, so you’re not just standing there.
quick posing guides.
The images below are easily digestible guides on posing for your graduation pictures.
Whether you’re planning on doing photos with me or not, you are encouraged to screenshot or download them. That way you have something to reference during your session.


If you’re a photographer, you’re more than welcome to copy this guide and adapt it for your own website.